How to Use All-In-One WP Migration Plugin for WordPress: Step by Step
The All-In-One WP Migration plugin, built by ServMask, is one of the best-known backup-and-restore plugins for WordPress. It now sits at over 5 million active installs and still offers a solid set of free features.
In this post, we will go over how you can use the plugin to create backup files quickly and restore them elsewhere.
Regardless of whether you’re moving your website to a new host or server or creating a temporary copy for testing updates and changes, the process is the same.
You can use this step-by-step guide to migrate your website with All in One WP Migration.
Quick Facts
| All-in-One WP Migration | |
|---|---|
| Developer | ServMask |
| Active installs | 5 million+ |
| Latest version | 7.106 (2026) |
| Free version | Export/import limited by your server’s upload settings |
| Unlimited Extension | $69/year, removes upload size limits (up to 50 sites) |
| License | Free on WordPress.org, paid extensions for larger sites |
Step #1: Install The All-In-One WP Migration Plugin
The All-in-One WP Migration is available for direct download from the WordPress repository. You don’t need to find a zip file and upload it manually.
To find the plugin, navigate to the Plugins section from the WordPress dashboard and click “Add New” at the top. Type the plugin name into the search bar, then click “Install Now” next to the listing.
Finally, activate the plugin by clicking “Activate.” This completes the installation, and you’ll see All-In-One WP Migration appear in your WordPress dashboard.
As always with any plugin that touches your whole site, keep it updated. ServMask has shipped several security patches for this plugin over the years, most notably a 2023 vulnerability that could expose migration data to unauthorized users, and more recent fixes for information disclosure issues. Running an outdated version is the main risk with a plugin this widely installed.
Step #2: Exporting Your Site
The plugin is still straightforward, with few settings to configure. To export a website, navigate to the plugin, click “Export To,” and choose how you want to export: to a file, via FTP, or to one of several cloud storage services.
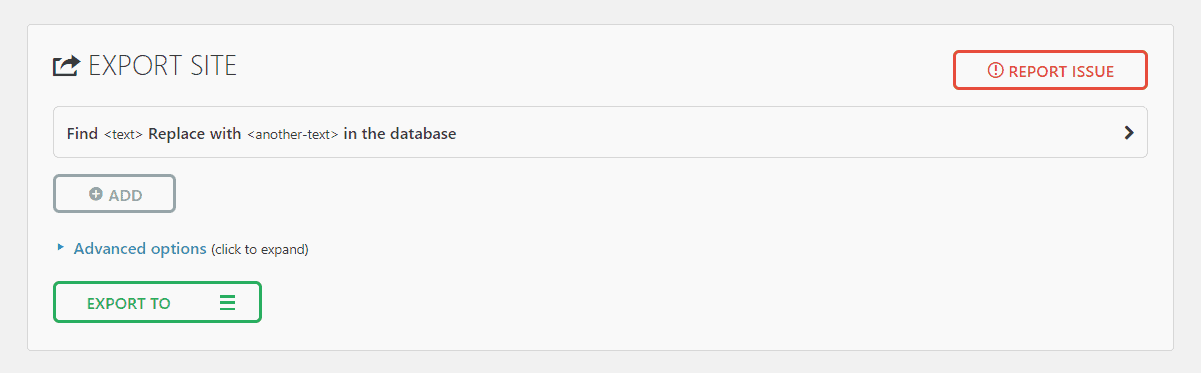
After you select an option, the plugin builds the backup and gives you a link to your file or starts the transfer.
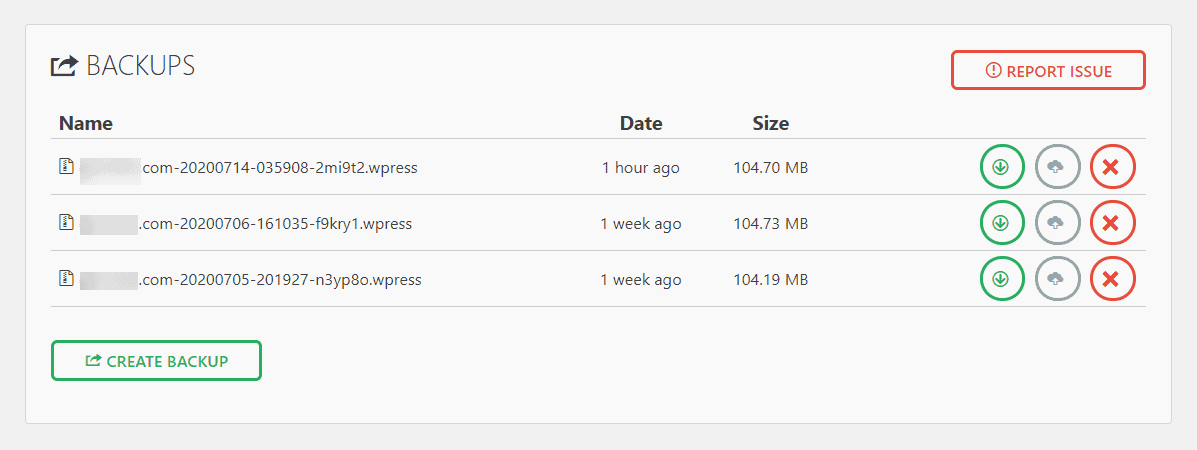
If you close the pop-up accidentally or need the file later, go to the plugin’s “Backups” section to find and download it.
The free (community) version only lets you export to a file. Exporting via FTP or to cloud storage requires a paid extension. This hasn’t changed since 2020.
You should also remember that this plugin doesn’t back up your entire WordPress installation the way something like Duplicator does. It only packages your site’s content and database, so you’ll need WordPress already installed wherever you restore it.
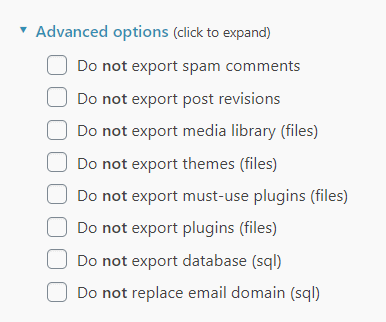
The plugin also offers advanced options mainly meant for troubleshooting, plus a find-and-replace tool for editing content in your database. Most users won’t need either.
If your site is large, the free version’s export size is capped by your server’s PHP upload settings, which is typically far below what a media-heavy site needs. ServMask’s Unlimited Extension, priced at $69/year for up to 50 sites, removes those caps and adds WP-CLI support, so that’s the upgrade path if you’re migrating anything beyond a small site.
Now that you know how to create a backup file, let’s look at importing.
Step #3: Importing Your Site
The restore process is the same whether you’re changing hosts or moving to a new server.
As mentioned, the plugin doesn’t back up a full WordPress installation. You’ll need WordPress already installed on the destination server. If you’re moving to an entirely new site, set up hosting and the domain before restoring.
If you’re switching hosts, take a few extra steps to avoid downtime: import the backup before changing your nameservers. One common approach is to get the new server’s IP and temporarily map your domain to it via your computer’s HOSTS file. That lets you complete the import and verify everything before you switch DNS.
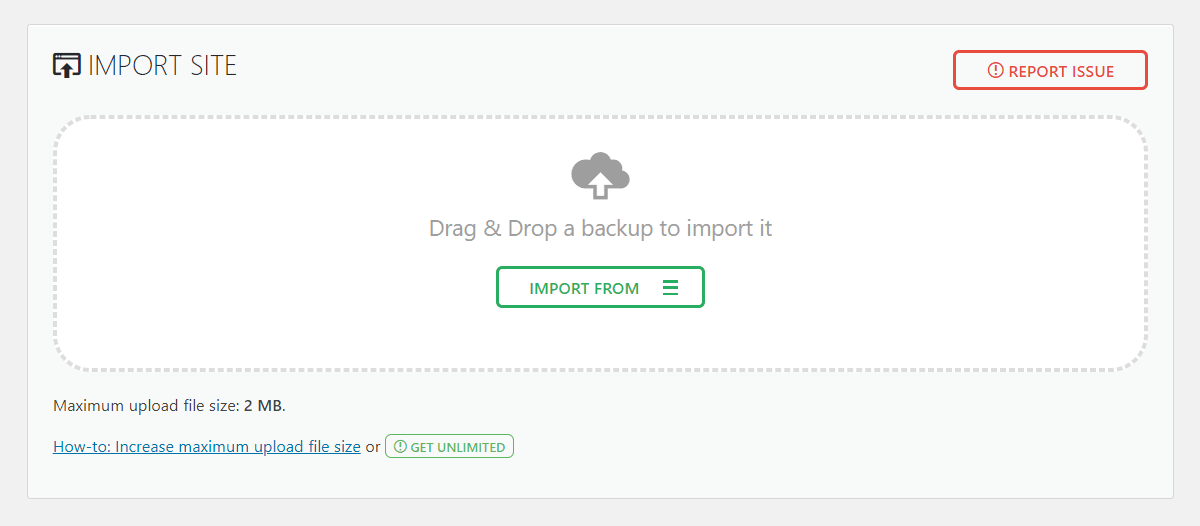
To import, install the plugin on the destination site, go to the Import section, and pick the matching option from the “Import From” dropdown.
You’re likely to hit the maximum upload file size limit at this point. This is still the plugin’s most common support issue, and the Import section includes a short guide for increasing the limit. If you’re regularly moving larger sites, the Unlimited Extension avoids this altogether.
Once everything is in order, select your backup file and wait for the plugin to restore your website. You’ll need to confirm that you’re OK overwriting the destination database, and within a few minutes the migration should complete.
A successful migration shows a “Data Successfully Imported” screen.
Log in to your restored site using the same credentials as before. Issues are rare, and ServMask support is available if you run into trouble.